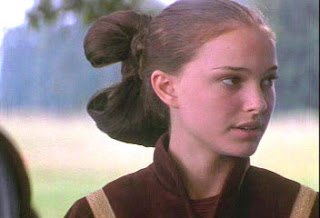
I really like the look of this one, despite the fact that it's
really hard to do with hair shorter than mid-back length, and it's extremely floppy and doesn't like to stay in very well. (I'm stuck wondering what kind of hair spray or pins she used to keep in up while battling her way into the palace.) But it's still pretty even if you have hair like mine: long, but not long enough to get the 'full' look that Padme has.
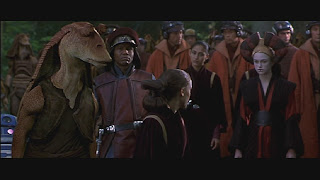
As you can see in the above two pictures, this style is basically two large loops of hair pinned at the back of the head and wrapped in a third strand of hair. No braiding involved; pretty simple, right? Well, provided you have long enough hair and an extra pair of hands. . . .
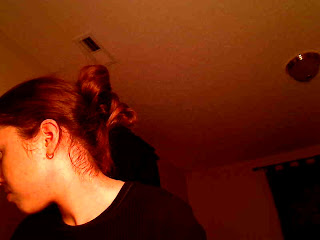
As is always expected, my first successful try wasn't so hot:
This style took me three tries to get to be satisfactory; partially because my hair isn't long enough to look like the original. As I realized, you'd need a couple good feet of hair to pull this style off easily and realistically. (Either that, or have an extra hairpiece.)
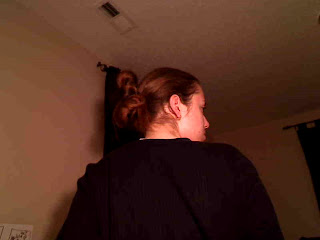
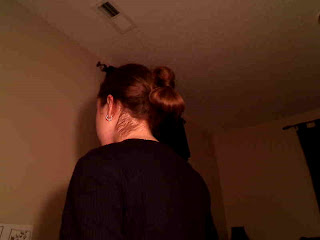
Ah, success! Well, mostly. I still haven't completely mastered this style. (Updates to come.)
What I did that worked was:
1. Gather all your hair into a mid-high ponytail. Separate a small section of hair from the rest (for use in wrapping around the base later.)
2. Take a second elastic to the ponytail (without the smaller section,) but on the last turn, not pulling the hair all the way through, thus leaving a big 'loop' of hair.
3. Comb the loop smooth (it does get messy in the prior steps, and you won't have much a chance to fix it later if you don't do it now,) by putting a few finger into the loop and holding it straight out behind you, and using your free hand to comb it. (You don't need to use a comb, as long as you're able to get it smooth.)
4. While still holding the loop out, bring the center of the loop in to touch its point of origin (ie., bring it straight back against the elastic,) so you have two 'loops' of hair. The bottom loop should be a bit bigger and fully than the top one, you you'll probably need to toy around with it some (using a mirror) until you get the proportions right. If everything falls out, simply take out the second elastic and redo the big loop, and go at it again. (Chances are, you'll wind up doing this several times in this and the next step before getting two good, smooth loops. Heheh, I redid it about five times and I still didn't get the proportions exactly right.)
5. Once you're holding it the way you want it, take a third elastic and wrap it around the top loop, making sure it's as close to the base as possible.
7. Finally, take that leftover section of hair you left out in step 1, and wrap it around the base and between the two 'loops' of hair. (A figure-8 works well.) If you need, you can pin the loops at the base if they're out of shape, but otherwise, you're done!
(If you haven't noticed, my hair isn't quite long enough to look exactly like Padme's. :D)

Original Instructions came from
Imaginary Styles.
Item needed:
3 elastics
Optional: bobby pins


